Categories
Afternoon Snack | 3pm Meal

Chooda Bhoonja | Chuda Bhaja | Chivda Recipe

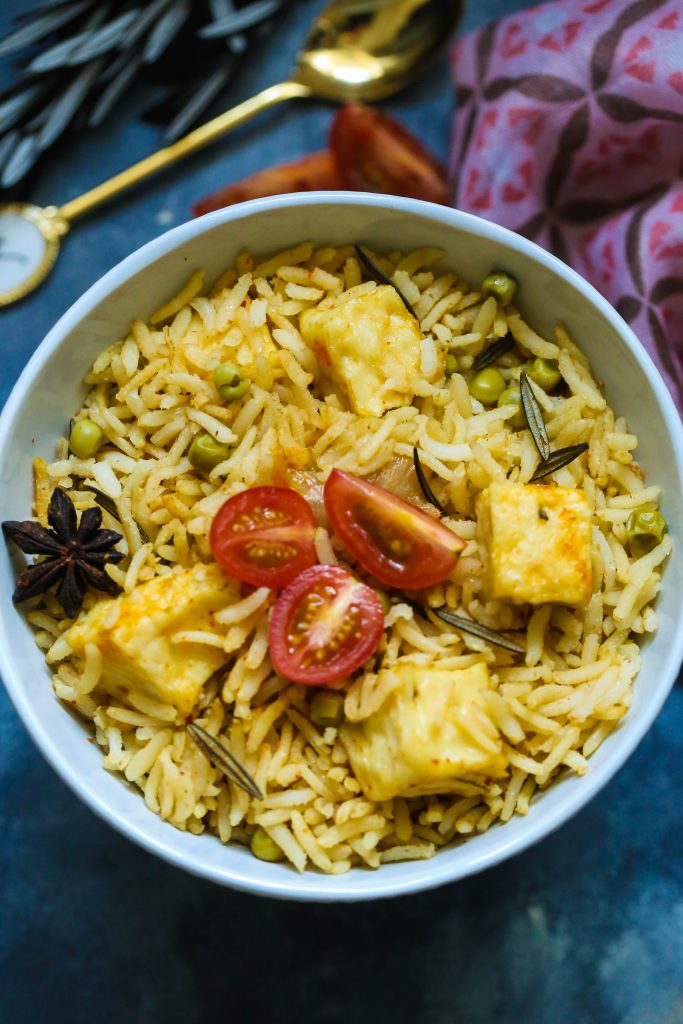
Chuda Bhaja, Chivda Bhaja, Chooda Bhoonja and there are many more spellings and names to this popular eastern India recipe.

Bhooja” or “Bhoonja” loosely translates to something roasted or fried. It is a quintessential Bihari snack. It is also popular in Odisha by the name Chooda Baja. Made with one or more roasted or fried ingredients there can be ample varieties that can be found – some to be prepared or eaten right away and some that store well for a few days. Puffed rice (murmure or moodhi), roasted gram, beaten gram (chana choor), flattened rice (poha or chooda or chivda or chuda), peanuts flavoured typically with raw mustard oil, lime, loads of green chilies, onion and coriander come together to create a riot of flavours and textures and make for a healthy and filling snack. 

I have vivid memories of enjoying all kinds of Bhoonja at my Daadi’s (grandmother’s) home. A few jars of recycled Horlicks bottles filled with one of my favourite snacks were a common sight in Daadi’s pantry. I would make sure to scoop out extra helpings of peanuts while serving myself. Peanuts ke bina (without peanuts) no Bhoonja is complete IMHO. 

Chooda Bhoonja My Way

So, I created my own version of Bhoonja – a little sweet, a little spicy, and sour. To half of it I added fried onions, the version we consumed right away and the remaining was stored in airtight containers. My favourite spicy peanut podi or dry chutney was added in good measure to spice things up a bit. Kids loved the sweet and sour flavours too. If you like to keep things simple just add salt to flavour and it will still taste as good. Add fried onions only if you are consuming the Bhoonja right away. Bhoonja when stored with fried onions release moisture and makes the fried poha soft.

I also added raisins and nuts in good measure along with roasted chana daal and peanuts. You can modify this step as well as per your taste and preference. I roasted them in a tablespoon of ghee but you can dry roast it too in a thick bottomed wok. To add more texture you could add fried sliced coconut (fresh or dried).

Step-Wise Recipe With Pictures

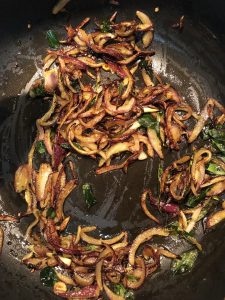
Before frying onions, you could also add some green chilies and curry leaves for added flavour and fry the onions till really nice and brown.

Roasted dry fruitsFrying onions

While the onions are frying, you can prepare the Spice Blend for the Bhoonja. I used garlic salt, raw sugar, amchoor, and peanut chutney powder. You could also use rock salt or plain salt.

Garlic Salt

I deep fried the poha as that really uplifts the taste. You can shallow fry it with little oil in a thick bottomed wok until it is well roasted and crispy but I do recommend deep frying for best results. Once the poha is fried, drain it on a kitchen towel and add the fried onions, sprinkle the spice blend all over, and give its nice mix until well incorporated

Deep fried poha for chooda bhunjaChooda Bhoonja With Peanut Podi

Then I transferred the mixture in the same wok used for frying onions and on a very low flame stirred it gently for another 2 minutes before serving it.

Without onions, this chooda bhoonja stores well for up to a week if stored in a dry place in an airtight container.

Chooda Bhoonja

Prep Time: 10 minutes

Cook Time: 20 minutes

Total Time: 30 minutes

Yield: 100

Serving Size: 6-8

Ingredients

  • Poha, thin variety- 2 cups
  • Slivered onion - 1 cup (optional)
  • Green chilies, sliced- 2 (optional)
  • Curry leaf- 10-12
  • Almonds, whole- 10-12
  • Cashews, halved vertically- 10-12
  • Peanuts- 1/2 cup
  • Raisins- 2 tbsp
  • Chana Daal- 2 tbsp
  • Sliced and fried fresh or dried coconut- 1/4 cup
  • Raw or brown sugar- 2 tbsp
  • Amchoor (raw mango powder)- 1 tbsp
  • Rock or regular salt- 1 tbsp or as per taste
  • Peanut Chutney powder- 1.5 tbsp (optional)
  • Ghee-1 tbsp
  • Oil for deep frying

Instructions

  1. Clean the poha well by sifting
  2. In a pan, add some ghee and roast the chana daal until nutty aroma arises and it just about starts to turn brown on the edges; keep aside
  3. In the same pan in the leftover ghee, roast the nuts and raisins and keep aside
  4. Add oil to a wok and once hot, fry the poha in small batches and drain on a kitchen towel; the poha will turn nice and crispy when fried well but do make sure to keep the flame on medium high and work swiftly as poha tends to burn easily
  5. Prepare the spice blend by mixing salt, raw sugar, amchoor and peanut podi powder
  6. If using onions, roast in some oil until nice and brown along with some green chilies and curry leaves, adding the curry leaves and green chilies first followed by onions; set aside
  7. Next mix the fried poha with fried onions, green chilis, curry leaves well
  8. Then sprinkle the spice blend on the above mixture and give it a nice mix
  9. Finally transfer the mixture to the same wok used for frying onions and bring everything together on a low flame
https://onewholesomemeal.com/chuda-bhaja-chooda-bhoonja-chivda-recipe/

Categories
Dinner | 8pm Meal Lunch | 1pm Meal

Raw Papaya Stir Fry | Rich in Vitamin C

How to eat raw papaya? Well, this recipe for a raw papaya stir fry is worth a try.

I was a very fussy eater growing up. I remember sitting at the table for hours together trying to finish my paneer or rajma or baingan (eggplant) or palak (spinach)! Apart from fish curry, eggs and potatoes I pretty much detested everything from the bottom of my heart. Meetha of all kinds (dessert) of course was an exception – I could eat that for breakfast, lunch, and dinner.

A Father’s Tomato Tale

Anyhow, coming back to my tryst with the dining table. You might wonder why would I sit there for hours? Simply because I was not allowed to leave the table unless the plate was wiped clean. Every time I sat there nauseated at the sight of any vegetables, my father would relate his Tomato Tale. What Tomato Tale you would ask next? So, here it goes, in my father’s own words:

“Dekho beta (my dear child)! When I was your age I hated tomatoes and spinach. I just could not stand the sight of it, let alone their taste! However, I did not give up on them. I just told myself I am going to pretend I am eating a bitter medicine and swallow them without thinking too much about their taste. And you know what! Today I love tomatoes and spinach.”

I found the story as unpalatable as the veggies themselves. However, the strict disciplinarian my Dad was, he kind of lived by the rule – my way or highway! So, what choice did a six-year-old me have but to follow orders?  I tried hard to imagine I was gobbling down a bowlful of halwa while chewing a repulsive hodgepodge of palak paneer.

Life Comes A Full Circle

But turns out my father (like most parents) knew a thing or two about psychology and growing up. I in fact love paneer and rajma now and propagate the (non-existential) benefits of eating baingan (eggplant) like it is the one true love of my life! And what more, I relate the same story to my children where the protagonist tomato has been replaced with paneer (which ironically is my children’s favorite)!

If I have to be honest, I have a much easier job at hand. I was an abysmal eater compared to my kids who more or less eat everything that is served to them. But I do have days when I have to bribe them with dessert or just cajole them to get food polished off their plates. If I have to be very honest again, this papaya stir fry fell in the latter category. But to my defense, isn’t it an important life lesson? Not everything served on the plate called life will make you happy and when it doesn’t, you just need to suck it up and get on with it in hope of better and happier things!

Raw Papaya Stir Fry Loaded with Vitamin C

Well, raw papaya is loaded with nutrition and it was called “the fruit of the angels” by Christopher Columbus for a reason. Now and then I do not mind being the Mean Mom to get my kids to eat them. As for the adults, this recipe might convert the greatest Papaya haters! It is really quick and easy to put together and tickles your taste buds like no other ‘coz it is sweet, spicy, and sour all at the same time. Great with hot phulkas and some moong daal. Perfect weeknight dinner as it is so light on the tummy!

Raw Papaya Stir Fry

Prep Time: 10 minutes

Cook Time: 15 minutes

Total Time: 25 minutes

Yield: 100

Serving Size: 3-4 people

Ingredients

  • Raw Papaya, cubed-2 cups
  • Onion, chopped fine- 3/4 cup
  • Garlic, chopped fine- 1.5 tsp
  • Ginger, coarsely grated- 1 tsp
  • Black Mustard seeds-1 tsp
  • Saunf or Fennel seeds-1 tsp
  • Coriander powder-1.5 tsp
  • Amchoor or dry mango powder- 1.5 tsp
  • Hing or asafoetida- 1/4 tsp
  • Turmeric powder- 1/2 tsp
  • Red Chilli powder- 1 tsp or as per taste
  • Powdered jaggery- 1 tbsp
  • Sprouted Moong- 2 tbsp
  • Lime juice-1 tbsp
  • Rock salt or regular salt-1/2 tsp
  • Peanut Chutney Powder or crushed roasted peanuts- 1 tbsp or as per taste
  • Salt- As per taste
  • Green chilies, chopped fine- 2 or as per taste
  • Vegetable Oil- 2 tbsp

Instructions

  1. Par-boil the cubed raw papaya and keep aside
  2. Wash the moong sprouts well and in a bowl mix lime juice and rock salt with the sprouts and keep aside
  3. In a wok heat some oil, reduce the heat to medium-low and to it add turmeric powder, mustard and fennel seeds and sauté until they start to crackle
  4. Then add chopped onion and cook for a minute followed by garlic and ginger and cook for another minute or so till the onions are translucent
  5. Next add coriander powder, red chilli powder and sauté for another minute
  6. To above add the par boiled papaya and give it a nice mix , then add powdered jaggery, amchoor, green chilies and salt; keeping the flame low, cover and cook for a minute or two
  7. The papaya should have cooked through and absorbed the masalas by now; turn off the heat and add the moong sprouts prepared earlier along with the peanut chutney powder or crushed peanuts
  8. Serve right away with hot fulkas and daal
https://onewholesomemeal.com/raw-papaya-stir-fry-rich-in-vitamin-c/

Categories
Lunch | 1pm Meal

Aloo Posto | Traditional Odiya Recipe

When times are tough, food can provide you a lot of comfort. More so when it is a specialty from home like this aloo posto recipe.

The other day I read this – If you swap the words “stuck” at home with “safe” at home, it suddenly changes everything. In a moment from feeling frustrated, one ends up feeling grateful and thankful. In one such moment of gratefulness and thankfulness, I penned the below lines:


It is not easy staying home he said

Life is boring, has lost its meaning

No parties to go to, no friends to meet

Staying within the confines of four walls

’Tis no fun at all!


It is not easy staying home

Kids yell, make demands 

So hard to be patient with all that noise

She wondered if he had met someone

Who did not have kids, at least not by choice


It is not staying home

Cooking & feeding is all there is to do

So hard to decide what’s on the menu

And he thought of those who did not eat a square meal today

Nor would they, tomorrow…..


It is not easy staying home

Days are long and nights quiet

So hard to kill time

Her heart sinks at the thought of those dreading the countdown 

Knowing well that much too soon it would be Time


What an irony it is

We whine and complain ‘bout things

Many would give anything to attain

Let us put an end to this chain of fret

And fill our hearts with gratitude 

There is so much to smile and be thankful for

And so little really, to regret!


I live these words every single day. Every time it feels like life is asking too much of me I remind myself of the gifts that it has given me – my two children the greatest of all. I do not have a perfect life by any means, far from it in fact but what has kept me going so far (and I hope it does in the future too) is my ability to not fret for too long after a crushing period of non-achievement, pull myself up and look to the future. I truly hope that I continue to do so.

Most of us are home now with limited ingredients to cook with. One such day when I was struggling with what to make, I got reminded of this aloo posto dish which I although did not grow up eating, has now become comfort food for me after I enjoyed it a few times at my in-laws.

It is an extremely forgiving recipe and requires just 5 ingredients – potatoes, posto (poppy seeds), kalonji (nigella seeds), green chilies, ghee/Oil, and salt of course. The simplicity of this dish is its strength and yet it does not compromise on flavours at all. I highly recommend it to people with low spice tolerance.

The only prep required is soaking the posto for an hour before you start cooking and make a smooth paste. Once that’s out of your way, the recipe is really really simple. You can make it more indulgent by adding a dollop of ghee to finish off and that does take it to next level and oh so good with some daal and rice. So here you go, another traditional Odiya recipe for you.

Potatoes cooked with poppy seeds

Aaloo Posto

Prep Time: 10 minutes

Cook Time: 10 minutes

Total Time: 20 minutes

Yield: 100

Serving Size: 3-4

Ingredients

  • Potatoes- 3 medium-sized, cubed
  • Poppy seeds- 4.5 tbsp, soaked in half a cup water for a minimum of one hour
  • Nigella seeds- 1tbsp
  • Green chilies - 2-3 , chopped fine or as per taste
  • Oil- 2tbsp, preferably mustard oil for best results
  • Ghee- 1 tbsp
  • Salt- 2 tsp or to taste

Instructions

  1. Scrub the potatoes well if using with skin, else peel and cube and let them soak in water
  2. Using minimal water blend the poppy seeds into a smooth paste
  3. In a thick bottomed pan, heat mustard oil and once the oil is hot, reduce the flame and add nigella seeds and chopped green chilies. Adding chillies at this stage imparts more heat to the final dish, however if that is not what you want, feel free to add chilies with the poppy seed paste
  4. Keeping the flame low, stir until the nigella seeds start to crackle, approximately 5-10 secs
  5. Then add potatoes and mix well, followed by poppy seed paste
  6. Reduce heat to low and add 2 tbsp water, stir and cover ; slow cook on a low flame till potatoes are tender
  7. Finally, season with salt and a dollop of ghee to finish
  8. Enjoy hot with toor daal and rice
https://onewholesomemeal.com/aloo-posto-traditional-odiya-recipe/

Categories
Afternoon Snack | 3pm Meal Breakfast | 8am Meal Most Popular Posts

Almond Turmeric Bliss Balls | Badam Haldi Laddus

These almond turmeric bliss balls have the perfect blend of tasty and healthy.

We live in uncertain times with new diseases emerging every other day and making our already stressful lives even harder. It is natural to worry about our health and that of our loved ones. However, worrying and stressing only impairs one’s immunity. Easier said than done I know and I feel I take 5 steps ahead and 6 steps back. But staying away from negative media and constant reminders to bring yourself back to the present moment helps.

How Do You Live A Healthy Lifestyle?

It was on one such stressful afternoon when I watched a video by the famous and well respected holistic lifestyle coach Luke Coutinho. In that short video, he spoke about small steps that one can take to boost one’s immunity. It involved taking a balanced diet and including protein in every meal, and working out. He also highlighted certain food items like – almonds, turmeric, ginger, kiwi, pumpkin amongst others which have great immunity-boosting properties. But most importantly, I feel, were his closing lines that no matter how healthy and how well one eats, it is going to be of no help if we are not mentally healthy. In other words, positive thoughts and good quality sleep, are a holistically healthy lifestyle in the truest sense of the word. And I feel this is pertinent and poignant not just in the current times when the world is trying to fight COVID19 but at all times.

Boost Your Immunity With Almond Turmeric Bliss Balls

As I watched the video, I tried to figure the best way possible to get all the immunity boosters Luke mentioned in our diet. It had to be simple and more importantly kid-friendly. My instant thought was laddus or bliss balls. This is an extremely forgiving recipe. Play around with the ingredients and their quantities based on your taste. For example, I added some ghee roasted makhanas (fox nuts) to add more body and crunch to the laddus.

Try my other recipes for energy balls, bliss balls and laddus.

Immune Boosting Almond Turmeric Laddoos inspired by Luke Coutinho

When I make bliss balls or laddus I usually blended all the ingredients in a high-speed blender or NutriBullet. This time I did not have NutriBullet at hand so I powdered all ingredients separately and then eventually blitzed it together for a few seconds to give it a nice mix.

I used two tablespoons ghee in the recipe but if you like a smoother texture you can use a little extra. I recommend eating a laddu first thing in the morning on an empty stomach with warm water or enjoy it as an afternoon snack. Sharing this just in time for Holi for you to try.Immune Boosting Almond Turmeric Laddoos inspired by Luke Coutinho

Almond-Turmeric Laddoos

Prep Time: 10 minutes

Cook Time: 10 minutes

Total Time: 20 minutes

Yield: 100

Serving Size: Makes 12-15 medium sized laddoos

Ingredients

  • Almond- 1 cup
  • Fox Nuts or Makhana, roasted in ghee- 3/4 cup
  • Pumpkin seeds- 1/2 cup
  • Turmeric- 1 tsp
  • Ginger Powder- 1 tsp
  • Freshly pound Black Pepper- 3/4 tsp
  • Jaggery, powdered or chopped fine- 1.5 cups or as per taste (can be substituted with honey)
  • Pure Ghee or Cold-pressed Coconut Oil- 2 tbsp

Instructions

  1. Blend almonds, fox nuts and pumpkin seeds one at a time in a high speed blender
  2. Next, mix all the powdered ingredients with the remanding ingredients and blend for 10-15 seconds again
  3. Empty the contents in a bowl, grease palms with some ghee and make laddoos of desired size
  4. Place in an air-tight container at room temperature and consume within a week
https://onewholesomemeal.com/almond-turmeric-bliss-balls-badam-haldi-laddus/

Immunity Boosting Almond Turmeric Bliss Balls inspired by Luke Coutinho

Categories
Dinner | 8pm Meal Lunch | 1pm Meal

Spinach and Tofu with Peanut Chutney Powder

My motto right now, stay calm and keep cooking. Happy to share this delish spinach and tofu with peanut chutney powder, despite all my worries.

Ideally, I like to start my posts with something positively philosophical or interestingly funny. Today’s post however is neither, because if I can be truly honest with you, after more than three sleepless nights in a row, I got out of bed feeling neither positive nor funny! On the contrary, I woke up puking my gut out (sincerest apologies if that is too much information)!

Accept and Flow in 2020

Why so much drama mama, you might wonder? Well! Last few days, my life here in Hong Kong has been nothing close to anything that I had ever remotely imagined. Yeah right! Who was I kidding! When has anyone’s life panned out as expected ever! Just a few weeks ago, as my husband and I sat enjoying (a very very rare) date night/anniversary dinner at one of our favourite restaurants, we made some promises to – learn from the year that had gone by, appreciate each other more, try and walk in each other’s shoes a bit before jumping to conclusions and be fully present during the precious time we were together as a family – in short, accept and flow! 2019 had been a tough year and we were all but ready to put that behind us and embrace the new year!

WuFLu Wrecks All Plans

Little did we know that destiny had mega plans to put our plans to test, a bit too soon, may I say. Just as I was gearing to dig into some juicy work projects and enjoy the beautiful Chinese New Year with the family, all hell broke loose. Out of nowhere the Wuhan Pneumonia or what most media folks are now terming as WuFlu started to spread like wildfire in China. While most Hong Kong folks do not consider themselves a part of China, geographically speaking we aren’t all that far! Ever since the news of this deadly, possible pandemic was out (coinciding perfectly with the CNY holidays), most people in Hong Kong (me included) got into panic mode! And could we be blamed? Some of us had lived through SARS and the rest had heard some horrific stories about it. But then none of us had expected to go through an equally testing phase yet again!

Not The Best Time To Catch The Common Flu!

We got to know of the outbreak sometime around Thursday last week, January the 23rd to be precise. We hoped all will be well, not knowing the extent of spread. Come Saturday morning and every newspaper and social media group was rife with discussions and news about this possible pandemic. Cooped up indoors, I spent every waking hour either talking or reading about this new strain of the virus. I was hoping for some positive piece of news. But there was none. By Sunday evening, cabin fever had got to me and I started to imagine every possible symptom in me. And almost as if I had willed it, by Tuesday evening both me and my kids started to show symptoms of the common cold.

As things are in such circumstances, I dreaded the worst and almost saturated them with home remedies and gallons of vitamin C. By the evening of 30th January my eldest started to get better, but the youngest not so much. Headache (one of the possible symptoms of the illness) seemed to have become my new best friend ( which could have been more because of anxiety and non-stop screen time) and littlest was taking a turn for the worst. He coughed all night. I could not sleep. I shed some tears and imagined all possible dreadful outcomes. While weighing my decisions to inform the family or not if something was to happen. In the morning I got out of bed, could not stand steady. I found my way to the bathroom and puked my innards out. I am not the coolest head to be around but this even for someone like me was unprecedented. Melodramatic as it may sound, it did help to clear my head and the husband helped to make a pediatrician appointment.

Stay Calm And Keep Cooking

Now, as I sit here typing this blog post, we are back home from the ped after being reassured it is not a scary infection. With some neurfen and panadol and plenty of TLC, it should wear off in a few days’ time. Trouble seems huge until a greater one strikes. Suddenly caring for a sick toddler or managing and entertaining two young children, cooped indoor 24/7 seems way easier than it did a few days back. I keep going back to the moment when the doctor said it was nothing to worry about. I could not have been more grateful at that moment. The scare of this dreadful epidemic is far from over and we still stand in the eye of the storm. However, I now understand that all the negative news needs to be taken with a pinch of salt and all my energy needs to be focussed on staying safe rather than imagining probable outcomes. And most importantly, keeping faith in the power of positive thinking!

And Now The Recipe For Spinach And Tofu With Peanut Chutney Powder

This was definitely not the best preamble to this easy-peasy and deliciously nutritious recipe. But given the uncertain times, we live in, I felt it was pertinent. Spinach and tofu flavoured with peanut chutney powder! Simple recipes are always the best! This one is my go-to during winters when we want something quick and flavourful. The peanut chutney is the bomb!

Peanut Chutney Powder

There are quite a few popular versions of this peanut podi or chutney that use coconut. The version I share here does not. I am a huge podi fan and I cannot choose between the two.

Peanut Chutney Powder

I have another saag-tofu recipe on the blog and this one is a spin-off on the same, except its much spicier thanks to the Peanut Chutney Powder, minus tomatoes. You can however control the spice level by reducing the number of red chilies in the powder. I do not recommend it as both spinach and tofu are great at balancing the spice. Please use the firmest variety of tofu available in the market for the best results. So, without further ado, here is the recipe.

Spinach Tofu with Peanut Powder Chutney

Prep Time: 30 minutes

Cook Time: 15 minutes

Total Time: 45 minutes

Yield: 95

Serving Size: 3-4

Ingredients

    For Peanut Chutney Powder
  • Peanuts with skin, shelled- 1 cup
  • Cumin seeds- 1 tsp
  • Coriander seeds- 1 tsp
  • Vegetable Oil- 1/2 tsp
  • Dried red chilies- 12-15
  • Garlic,peeled- 1 head
  • For Spinach-Tofu stir fry
  • Spinach, finely chopped- 5 cups
  • Hard Tofu cut in desired size pieces-1.5 cups
  • Garlic, finely chopped- 2 teaspoons
  • Cumin- 1 teaspoon
  • Turmeric powder -1/2 teaspoon
  • Green chilies-2 (optional)
  • Mustard oil-1.5 teaspoon
  • Salt-1 teaspoon or as per taste
  • Peanut Chutney Powder- 3 tbsp or as per taste
  • Toasted coconut slivers for garnish

Instructions

    For Peanut Chutney Powder
  1. Dry roast the peanuts lightly in a thick bottomed frying pan over medium heat, turn off the heat and peal off the skin by rubbing them between the palms of your hands
  2. Dry roast the cumin and coriander seeds over medium heat until light brown, turn off the heat and keep aside
  3. Add 1/2 tsp vegetable oil to the same pan and roast the dried red chillies for a few minutes on medium heat till they turn a shade darker, add garlic and stir fry for another 2-3 minutes
  4. Bring all roasted ingredients to room temperature and grind in a high speed blender to a coarse powder so it retains its texture; over blending might "cook" the peanut and make the blend slightly sticky as fats release
  5. For Spinach-Tofu stir fry
  6. Heat oil in a thick bottomed skillet and stir fry tofu till light brown; drain excess oil from the tofu on a kitchen towel and keep aside
  7. To the same pan, add cumin seeds, garlic and turmeric and stir till the spices start to crackle. Be careful to not burn them or it would make the dish bitter
  8. Add spinach,cover and cook till almost done; Then uncover and let the excess water dry out on a low flame; stir intermittently
  9. Add tofu and salt ,mix well and simmer for another 2-3 minutes
  10. Turn off heat, add the peanut chutney powder and mix well; garnish with toasted coconut slivers and serve with hot phulkas or daal and rice
https://onewholesomemeal.com/spinach-and-tofu-with-peanut-chutney-powder/

Categories
Lunch | 1pm Meal Most Popular Posts

Vegan Beetroot and Tofu Burger

While I am very excited that I cracked this Vegan Beetroot and Tofu Burger recipe and cannot wait to share with you, I also have an urge to share something else as important.

We live in difficult times. Phones are smarter than people and our planet is in the wrong hands. Most of us continue to live in the optimism bubble that the human race is going to find a way. Maybe it will and everything will be alright eventually. But we need to take some preventive steps nonetheless. Unfortunately very few of us are actually doing so

My Two Bits

We as a family are committed to taking baby steps too. We almost never use single-use plastic-shoppings bags, straws, water bottles. This year we are also committed to reducing our meat consumption. Red meat at home was always a no-no, and now even white meat is consumed once a week. And I am always looking for ways to make delicious, meat-free meals at home.

Finding The Middle Path

The boys love a good burger. The could have it thrice a day, seven days a week. And I usually do not stop them from enjoying a regular burger when we are out, but at home, it is mostly veg or at the most chicken. And over time I have realised that burgers are a great way to conceal veggies and make it a complete meal!

The Impossible Burgers are a current rage here in Hong Kong (and I presume the rest of the world too) and la familia loves it. And because I love a good challenge, I decided to create it at home :))

Using the ready to use impossible meat was a possibility. I wanted to try something different, however.  So, I used some other special ingredients. And boy it tasted gooood! The fussy family polished it off for lunch and wanted the same thing for dinner too! Mission (Im)Possible was well accomplished!!

Vegan Beetroot Patty

The star ingredient was of course finely grated beetroot.  I have another version of beetroot tikkis or cutlets on the blog, but this time I decided to switch things around a bit and also played with flavours. I also gave a desi (Indian) twist to it. Two ingredients that greatly impacted the texture were hard tofu (the variety one uses for frying) and boiled mashed green peas. I also added boiled potatoes, breadcrumbs, and roasted chickpea flour as binders. And threw in some spinach(which I cooked with onions and garlic) to make the patty healthier and wholesome. Raw onions release water when they come in contact with salt , making the patty soggy and hard to bind, hence I cooked the onions with garlic until translucent. And last but most importantly, I added Chettinad Spice Mix to flavour things up a bit. I did mean it when I said, the simple way doesn’t come easily to me :))


Vegan Beetroot Burger

Prep Time: 60 minutes

Cook Time: 15 minutes

Total Time: 1 hour, 15 minutes

Yield: 100

Serving Size: 6-8

Ingredients

    For the patty
  • Beetroot, finely grated- 1 cup
  • Carrot, finely grated -1/4 cup
  • Boiled and mashed green peas- 1/2 cup
  • Spinach finely chopped cooked with onion and garlic- 1/3 cup
  • Potato, mashed - 2/3 cup
  • Tofu, mashed - 1/2 cup
  • Finely chopped onion-1/2 cup
  • Finely chopped garlic- 1 tbsp
  • Roasted Chickpea flour- 1/2 cup
  • Breadcrumbs- 1cup
  • Coriander (dhaniya) powder- 1 tsp
  • Chettinad Masala- 3 tsp ( feel free to swap it with garam masala or cajun spice as desired)
  • Salt- 1 tbsp or to taste
  • Oil for shallow frying
  • For the burger
  • Burger buns- 4
  • Butter to warm the buns in
  • Lettuce
  • Tomato
  • Onions
  • Mild or Smoked Cheddar Cheese Slices
  • Other vegetables or accompaniments of choice you enjoy in your burger

Instructions

  1. Boil two medium sized potatoes, mash and keep aside
  2. Boil green peas, drain water completely, mash and keep aside
  3. Roast the chickpea flour on a low flame, stirring continuously for 2-3 minutes till a nutty aroma releases; be careful not to over roast and burn, just enough until the flour slightly change colour
  4. In a thick bottomed pan add some oil and to it add garlic ; stir on a low flame until light brown and fragrant , then add onion and cook till translucent
  5. Add chopped spinach to the above mix and cook till tender; keep aside to cool
  6. In a wide and deep bowl add all ingredients of the patty and mix well; taste for salt and adjust if needed
  7. Form into discs almost as big or a tad smaller than your burger bun and refrigerate for 30 minutes
  8. Heat oil in a pan and shallow fry the patties until golden and crispy, flipping sides halfway through
  9. Lightly toast the burger buns on both sides in a pan with melted butter
  10. Assemble your burger and enjoy with your favourite dip!
https://onewholesomemeal.com/vegan-beetroot-tofu-burger/

Vegan Beetroot Patty