Categories
Afternoon Snack | 3pm Meal Mid-Day Snack | 10 am Meal

Almond & Besan Laddoos | Refined Sugarfree | Healthy Recipe

And Diwali treats continue. In the series of refined sugar free desserts here is one more-Almond & Besan Laddoos. They are made with chickpea flour (besan) and almond flour and loosely inspired by the Gujarati delicacy Magaj Na Laddoo.

Same-Same But Different

Magaj laddoos and these laddoos are similar yet different. Similar because both use besan and almond flour. Different because these laddoos use more ghee and no milk at all. However, if you do decide to use castor sugar then ghee used is reduced as castor sugar also acts as a binder. You would not need to use the two tablespoons in the end. But between sugar and ghee, you know which is a better option 😉

Magaj Na Laddoos & Sweet Memories

Food is delicious more so because of the love associated with it. No matter how average a cook one’s mother is but “Ma ke haath ka chana (food cooked by mum)” is always specialWhy else but because of all the love she puts in while she cooks for her child. And I think that is the reason why Magaj Na Laddoos are so special to me. Not because my mum made it. But because my lovely roommate’s mum (back in undergrads) would make it and send along after each summer break.

Every evening after the unpalatable mess (cafeteria) dinner all of us friends would gather in Room 311 (the room I shared with three other girls) and open our snack boxes to share. Each box would hold love from home, some homemade some store bought but packed with utmost love and care by our respective mothers. The best part? Each one of us would rejoice in sharing the goodies and savouring the speciality treats from others’ snack boxes. And Magaj na laddoos from P’s snack box would be claimed almost entirely by me. And also the sukhdi and kopra paak. Have I convinced you enough how big a fan of Gujarati sweets I am?!

Then let us proceed to the recipe of the Almond & Besan Laddoos.

Helpful tips to make Almond-Besan Laddoos

  1. Good quality ghee, especially grass-fed cow’s ghee makes all the difference
  2. Roasting the besan-This requires some elbow grease but not to be cut short. A good 15-20 minutes on a low flame till nutty aroma arises and colour of besan starts to change
  3. Blanched almond flour- Almond flour comes in two varieties- raw and blanched. The latter version is recommended for this recipe. If you are unable to find it in stores then worry not! It can be easily made at home.
  4. I used raw cane sugar in the recipe but you can use any kind of brown sugar but make sure to add sugar into the besan after taking it off heat. You do not want sugar to melt and make the mixture runny and unbindable
  5. Once sugar is added, add approximately 2-3 tbsp of melted ghee. Add one tablespoon, give it a nice mix and then the add the remaining ghee gradually, testing as you go if the mixture binds. Depending on the kind of almond flour you use, you would need anywhere between 2-3 tablespoon ghee. Just enough to bind the laddoos
  6. Make sure to wet your palms with water before you start binding the laddoos. This make the binding process easier and also ensures you do not burn your hands
  7. I garnished with rose petals but you could also use chopped almonds and pistachios to garnish

Ingredients to make Almond-Besan Laddoos

  1. Ghee, melted- 1/2 cup+ 2 tbsp
  2. Besan (chickpea flour)-2 cups
  3. Blanched almond flour- 2 tbsp
  4. Raw Sugar/Brown Sugar- 1/2 cup or as per taste
  5. Cardamom powder, freshly ground- 1 tsp
  6. Slivered almonds- 1 tbsp and some extra for garnish
  7. Chopped raisins- 1 tbsp
  8. Dried rose petals for garnish
  9. One cup water

Method to make Almond-Besan Laddoos

  1. Heat ghee in a heavy bottomed pan, once the ghee is hot, reduce the flame to low and add besan
  2. On a very low flame with continuous stirring cook the besan till it starts to change colour to a dark muddy yellow and a nutty aroma arises; this will take approximately 20-25 minutes from start to finish
  3. Once besan is well roasted take it off the flame and add almond flour, brown/raw sugar, chopped raisins and slivered almonds and give it a nice mix
  4. Take the mixture back to the flame and add 2 tbsp ghee and mix again and continue to stir for another 2-3 minutes
  5. Turn off heat, and let the mixture cool down for 5 minutes, then wet your palms and start to roll the mixture into laddoos/balls of desired size ; be careful to wet your palms well to avoid burning
  6. At this stage if you feel the laddoos are not coming together , add some more ghee and bind
  7. Garnish with slivered almonds or rose petals or both

See video below for a step by step:

Almond & Besan Laddoos- Refined Sugarfree Healthy

Prep Time: 15 minutes

Cook Time: 40 minutes

Total Time: 45 minutes

Yield: 100

Serving Size: 12-14 medium sized laddoos

Ingredients

  • Ghee, melted- 1/2 cup+ 2 tbsp
  • Besan (chickpea flour)-2 cups
  • Blanched almond flour- 2 tbsp
  • Raw Sugar/Brown Sugar- 1/2 cup or as per taste
  • Cardamom powder, freshly ground- 1 tsp
  • Slivered almonds- 1 tbsp and some extra for garnish
  • Chopped raisins- 1 tbsp
  • Dried rose petals for garnish
  • One cup water

Instructions

  1. Heat ghee in a heavy bottomed pan, once the ghee is hot, reduce the flame to low and add besan
  2. On a very low flame with continuous stirring cook the besan till it starts to change colour to a dark muddy yellow and a nutty aroma arises; this will take approximately 20-25 minutes from start to finish
  3. Once besan is well roasted take it off the flame and add almond flour, brown/raw sugar, chopped raisins and slivered almonds and give it a nice mix
  4. Take the mixture back to the flame and add 2 tbsp ghee and mix again and continue to stir for another 2-3 minutes
  5. Turn off heat, and let the mixture cool down for 5 minutes, then wet your palms and start to roll the mixture into laddoos/balls of desired size ; be careful to wet your palms well to avoid burning
  6. At this stage if you feel the laddoos are not coming together, add some more ghee and bind
  7. ogether , add some more ghee and bind
  8. Garnish with slivered almonds or rose petals or both
https://onewholesomemeal.com/almond-besan-laddoos-refined-sugarfree-healthy-recipe/

Almond & Besan Laddoos- Refined Sugarfree Healthy Recipe

Categories
Afternoon Snack | 3pm Meal Breakfast | 8am Meal

Besan Ki Barfi | Easy Recipe with 5 simple ingredients

If you read my last post or for that matter any post that I put up around late October/November then you already know my love for the festive season. And most recipes around this time are in keeping with the spirit of festivities. And this Besan Ki Barfi is no exception.

We love Indian desserts as a family. Because they are home made one knows what ingredients have gone in. Our most favourite kind are desserts with chickpea flour  aka besan

My best friend Besan

The nutty taste of roasted chickpea flour goes very well with sugar (white or brown you can take your pick) and its versatility makes it a favourable ingredient in a lot of desserts. Besan laddoos are one of my favourites and they are so easy to whip up. I make them a lot at home and the plan was the same during Ganesh Chaturthi but the Gods had greater plans in mind and I “messed up!” Like I always do in the kitchen, I was multitasking. But multitasking is not always a great idea you see! Because I for some (in the hindsight good) reason forgot that sugar goes into the roasted besan when it has cooled off a tad bit. And hence the sweet fiasco happened!

But boy was it a delicious fiasco! Because the outcome were these decadent melt in your mouth Besan Barfis ! And they vanished in a jiffy too! My boys love these barfis more than the besan laddoos now. I will be making them again for Diwali and I am so excited to share this recipe with you. Hope you like and try it for your festive spread!

Tips to making Besan ki Barfi

  1. Good quality ghee preferably pure ghee made with cow’s milk is best for making Indian Mithai. See here how I make ghee at home with store bought grass-fed butter.
  2. Roasting besan continuously for around 30 minutes on a low flame . Unless you are very confident and an expert at making Indian mithais , keep the flame low and do not leave the pan unattended until the besan is well roasted. Nutty aroma and change in colour from yellow to a darker muddy yellow is a good indicator
  3. Use a good quality thick bottomed pan to avoid burning the besan while roasting
  4. Line your pan with greased parchment so you can cut and pull out the barfis easily once they have cooled down
  5. When cutting the barfis in desired shape use a sharp knife and keep wiping it off with a wet kitchen towel intermittently for mess free slices
  6. These barfis stay well until 10 days at room temperature and even longer in cooler weather. I do not recommend refrigerating them.

Ingredients for making Besan ki Barfi

  1. Besan (chickpea flour)- 2 cups
  2. Melted ghee- 1.25 cups (one cup+ one-fourth cup) and little extra for greasing the parchment
  3. Powdered sugar- 1 cup or as per taste
  4. Cardamom powder-1 tsp
  5. Coarsely powdered almonds- 1 tbsp
  6. Slivered almonds- 3 tbsp for garnish

Method for making Besan ki Barfi

  1. Line a cookie sheet or steel plate with parchment and brush some ghee on it and keep aside
  2. Sift the besan and keep aside. This breaks lumps and helps with even cooking
  3. In a heavy bottomed wide pan melt ghee and then reduce the flame to medium low and add besan
  4. Cook on low flame with continuous stirring until the besan and ghee mixture reaches a semi solid stage. The colour of besan also changes to a darker shade of yellow. Do note that the mixture starts to clump together first before it starts to thin out. The entire process takes about 25-30 minutes on a low flame.
  5. Add cardamom powder halfway through the above step
  6. After approximately 30 minutes when the semi solid stage is reached add powdered sugar and coarsely powdered almonds and mix well
  7. Turn off heat and transfer to the prepared greased plate
  8. Garnish with slivered almonds and let it come to room temperature . This takes around one hour or so
  9. Cut out into desired shape with a sharp knife making sure to wipe the knife in between to make the process mess-free and get clean slices
  10. Store in an air-tight container at room temperature and consume within 10 days. It lasted for jus two days at our’s 😉

Besan Ki Barfi

Besan Ki Barfi

Prep Time: 10 minutes

Cook Time: 30 minutes

Total Time: 40 minutes

Yield: 100

Serving Size: Makes 20 medium sized barfis

Ingredients

  • Besan (chickpea flour)- 2 cups
  • Melted ghee- 1.25 cups (one cup+ one-fourth cup) and little extra for greasing the parchment
  • Powdered sugar- 1 cup or as per taste
  • Cardamom powder-1 tsp
  • Coarsely powdered almonds- 1 tbsp
  • Slivered almonds- 3 tbsp for garnish

Instructions

  1. Line a cookie sheet or steel plate with parchment and brush some ghee on it and keep aside
  2. Sift the besan and keep aside. This breaks lumps and helps with even cooking
  3. In a heavy bottomed wide pan melt ghee and then reduce the flame to medium low and add besan
  4. Cook on low flame with continuous stirring until the besan and ghee mixture reaches a semi solid stage. The colour of besan also changes to a darker shade of yellow. Do note that the mixture starts to clump together first before it starts to thin out. The entire process takes about 25-30 minutes on a low flame. 
  5. Add cardamom powder halfway through the above step 
  6. After approximately 30 minutes when the semi solid stage is reached add powdered sugar and coarsely powdered almonds and mix well
  7. Turn off heat and transfer to the prepared greased plate 
  8. Garnish with slivered almonds and let it come to room temperature . This takes around one hour or so
  9. Cut out into desired shape with a sharp knife making sure to wipe the knife in between to make the process mess-free and get clean slices
  10. Store in an air-tight container at room temperature and consume within 10 days. It lasted for jus two days at our's 😉
https://onewholesomemeal.com/besan-ki-barfi/

Besan Ki Barfi

Categories
Afternoon Snack | 3pm Meal Breakfast | 8am Meal Mid-Day Snack | 10 am Meal

Eggless Semolina Mini Cakes | Refined Sugar-free | Easy Recipe

Festive season for most Indians starts from the month of September itself and goes on well until X’mas and New Year. Add another few months for us folks in Hong Kong and it goes on until the Chinese New Year. Long story short, it is months and months of indulgent and sugary treats. And if you ask me it is hard to say no to indulgence as more often than not it is also what our body craves in cooler months. I am all for indulgence but with a tad bit of mindfulness. Festivities do not mean every single meal has to be a feast and every feast sugar laden.

Eating right during festive season

Feasts when planned mindfully can be a bit of both-indulgent as well as healthy. And a good balance of both helps that we continue to enjoy the festivities longer without any guilt. I do feel that reducing refined sugar in a our diets along with processed food and balancing it out with portion control does work wonders . Anyhoo! Since I am not a registered medical practitioner (well! I could be one if I were in India with my Pharmacy degree) or a nutritionist I shall rest my health advice here and move on to more interesting stuff.

Diwali is my favourite festival and why not!

Diwali for us is very special as it is one of the most fun festivals to enjoy what with all the exciting things to do- lighting diyas, dressing in fineries and exchanging presents with friends. What’s not to love? And one of the most favourite things that I love about Diwali is sharing home made treats with my friends. Mawa gujiyas , pulaao, til-mawa laddoo are some of my favourite things to cook. This year I decided to add a few more interesting recipes to the list and one of them is this Eggless Semolina Mini Cakes which is refined sugar free too. And with just a hint of cardamom it fits in perfectly with your remaining Diwali/festive spread!

Tips to make perfect Eggless Semolina Mini Cakes

  1. Even if using the super fine semolina make sure to grind it well in a blender to make a fine powder. However if you would like a grainy texture in your mini cakes then you may grind it only coarsely
  2. Make sure the butter is at room temperature and not hot
  3. You can use any kind of sugar in this recipe. I used a combination of raw sugar and gud (jaggery) for a more intense flavour. Make sure to grind it to a powder
  4. Mix the dry ingredients and wet ingredients separately before adding the dry to wet in intermittent additions and mixing gently as you go
  5. You can swap half the yogurt with two eggs but make sure the eggs are at room temperature
  6. The oven should be preheated well for 15 minutes before placing the batter in for even baking
  7. One tip from Sally’s baking blog that has worked for me is baking first at 200 degrees for five minutes and then reducing the oven temperature to 177 degrees for soft and well baked muffins
  8. You can adjust the quantity of sugar as per taste

Ingredients to make perfect Eggless Semolina Mini Cakes

  1. Semolina (sooji/rawa), preferably fine variety, ground fine-1 cup
  2. All purpose flour-1/2 cup
  3. Whole wheat flour- 1 cup
  4. Raw sugar/ gud (jaggery), ground fine- 1 cup or as per taste
  5. Fresh yogurt/ curd- 1 cup
  6. Milk- 3/4 cup
  7. Baking soda- 1 tsp
  8. Baking powder- 1tsp
  9. Salt- 1/2 tsp
  10. Flavourless vegetable oil-1/2 cup
  11. Melted Butter at room temperature- 1/2 cup
  12. Vanilla extract- 1 tsp
  13. Ground cardamom- 1/2 tsp or a little extra if you would like a strong cardamom flavour
  14. Chopped nuts or semi-sweet chocolate chips (optional)- 1/2 cup
  15. Muffin tins or 8 inch round cake pan

Method to make perfect Eggless Semolina Mini Cakes

  1. Grease muffin tins with parchment and non-stick cooking spray or butter and flour and keep aside
  2. Preheat your oven to 200 degrees
  3. In a bowl sift together refined flour, whole wheat flour, baking powder, baking soda and salt and keep aside
  4. In another bowl whisk the yogurt until smooth and then add milk, powdered raw sugar/jaggery, butter, cardamom powder(if using) and vanilla extract and mix well to form a homogenous mixture
  5. Add semolina to the above liquid mixture and cover and let it rest for 20 minutes
  6. After 20 minutes the semolina batter thickens up considerably; fold in the sifted dry ingredients
  7. Do not over-mix as that would lead to a dry and clumpy cake
  8. Add chopped nuts or chocolate chips if using and give it one final gentle mix
  9. Spoon in the batter into muffin tins or cake pan and bake for approximately 25 minutes. Bake at 200 degrees for first 5 minutes and then reduce the temperature to 177 degrees and bake for the remaining time or until a toothpick inserted into the cakes comes out clean. The baking time may vary depending on the oven so keep checking after 15 minutes
  10. Bring to room temperature , bring out of the muffin tins and enjoy!

Eggless Semolina Mini Cakes- Refined Sugar-free Easy Recipe

Prep Time: 30 minutes

Cook Time: 30 minutes

Total Time: 60 minutes

Yield: 100

Serving Size: 12 -16 muffins

Ingredients

  • Semolina (sooji/rawa), preferably fine variety, ground fine-1 cup
  • All purpose flour-1/2 cup
  • Whole wheat flour- 1 cup
  • Raw sugar/ gud (jaggery), ground fine- 1 cup or as per taste
  • Fresh yogurt/ curd- 1 cup
  • Milk- 3/4 cup
  • Baking soda- 1 tsp
  • Baking powder- 1tsp
  • Salt- 1/2 tsp
  • Flavourless vegetable oil-1/2 cup
  • Melted Butter at room temperature- 1/2 cup
  • Vanilla extract- 1 tsp
  • Ground cardamom (optional)- 1/2 tsp or a little extra if you would like a strong cardamom flavour
  • Chopped nuts or semi-sweet chocolate chips (optional)- 1/2 cup
  • Muffin tins or 8 inch round cake pan

Instructions

  1. Grease muffin tins with parchment and non-stick cooking spray or butter and flour and keep aside
  2. Preheat your oven to 200 degrees
  3. In a bowl sift together refined flour, whole wheat flour, baking powder, baking soda and salt and keep aside
  4. In another bowl whisk the yogurt until smooth and then add milk, powdered raw sugar/jaggery, butter, cardamom powder (if using) and vanilla extract and mix well to form a homogenous mixture
  5. Add semolina to the above liquid mixture and cover and let it rest for 20 minutes
  6. After 20 minutes the semolina batter thickens up considerably; fold in the sifted dry ingredients 
  7. Do not over-mix as that would lead to a dry and clumpy cake
  8. Add chopped nuts or chocolate chips if using and give it one final gentle mix
  9. Spoon in the batter into muffin tins or cake pan and bake for approximately 25 minutes. Bake at 200 degrees for first 5 minutes and then reduce the temperature to 177 degrees and bake for the remaining time or until a toothpick inserted into the cakes comes out clean. The baking time may vary depending on the oven so keep checking after 15 minutes
  10. Bring to room temperature , bring out of the muffin tins and enjoy!
https://onewholesomemeal.com/eggless-semolina-mini-cakes-refined-sugar-free-easy-recipe/

Eggless Semolina Mini Cakes- Refined Sugar-free Easy Recipe


Categories
Afternoon Snack | 3pm Meal Breakfast | 8am Meal

Nolen Gur Kalakand | Milk Dessert with Date Palm Jaggery

Nolen Gur or Date Palm Jaggery is a name synonymous to a lot of people who hail from the Eastern part of India. Available fresh only during the winter months, as the winter sets in, earthen pots are fitted to date palm trees where incisions are made, a tapper attached to it in order to collect the sap. This sap is then boiled on low heat till it thickens resulting in this delicious ambrosial Nolen Gur or Date Palm Jaggery.

Not just another sweetener

To say that this sweetener takes any milk dessert to next level is an understatement . You have to try it to believe it . It also has very many health benefits , so much so that ace nutritionist Rujuta Diwekar calls it “a feast for sore eyes, rusty gut and cramped calf muscles.” With its high iron and magnesium levels it also helps regulate the haemoglobin and nervous system. And to me Nolen Gur Kalakand is one of the best ways to enjoy this gift of nature.

Each time I make a trip to India in the winter months I bring back a few jars of this deliciousness and freeze it. Then I continue to use it through the year (not so much during peak summers as Nolen Gur has strong warming properties) for various desserts especially the milk based ones like kheer. And because I had a lot of Gur on my hand this time I decided to make Nolen Gur Kalakand. Now, I grew up in Eastern India and we were spoilt for choices when it came to good Mithai (Indian desserts), especially the Bengali Mithais like Rasgullas and Kalakand. I can confidently say I have never tasted any better anywhere in India.

Why do I make mithai?

But now that we are in Hong Kong, you can very well imagine our predicament each time we try to find good tasting mithai. It is just impossible to find the good milk based ones especially. After searching high and low, I gave up and started to make my own. So far, Rasgullas and Kalakand are my favourite things to make at home. And I make them both from scratch, no condensed milk or store bought khoya, all the good homemade stuff .

It is labour intensive and time consuming but not difficult at all. One just needs to take note of the little things like the ones mentioned below and everything turns out just fine. While making rasguallas involves making fresh chena or cottage cheese , kalakand is a tad more tedious as one needs to make khoya (reduced, thickened milk)as well. It is a time consuming process for sure but then the results are worth it and much better than using milk powder or condensed milk. And as I always maintain, good things take time :))

So, here area few tips to make the perfect Nolen Gur Kalakand :

  1. Use full fat milk for making both khoya and chena. There are no two ways about it. Skim milk will just not work
  2. To make good chena, once the milk comes to boil, turn off heat and let it sit for a minute or two before adding vinegar or lime. This results in good yield too
  3. Wash the chena very well with clean drinking water to take away the sour smell and taste of vinegar or lime, whichever you use to curdle milk; you do not want sour smelling kalakand
  4. Drain the chena very well for at least two-three hours so that no moisture remains . I usually drain it in the fridge overnight placing it inside a muslin which in turn is placed in a strainer above a bowl. Moist chena makes soggy kalakand
  5. Go easy on the chena while kneading, we do not want very smooth texture for kalaknd unlike rasguallas , hence knead with light hands
  6. Making khoya is a time consuming process but it is also important you stir constantly so it doesn’t stick to the pan
  7. Once you mix all ingredients together , set it in a pan and refrigerate for a couple of hours before consuming

So, lets get cooking. There are three main steps into making Nolen Gur Kalakand:

  1. Making chena/ cottage cheese
  2. Making khoya/ reduced thickened milk
  3. Bringing it together

Making Chena

  1. Bring 1.5 litres of milk to boil; once the milk is boiling turn off the heat and let it sit for 2-3 minutes
  2. Add 2 tbsp of lemon juice or vinegar and give it a stir ; milk will start to curdle
  3. Strain the whey out through a muslin placed over a strainer as shown in the picture above
  4. Give chena a nice rinse with 10 cups of water making sure no sour smell of lime or vinegar remains
  5. Drain well for a couple of hours or overnight in the fridge to take away all the excess moisture
  6. Once chena has drained well, add finely chopped Nolen Gur and mix gently and refrigerate

Making Khoya

  1. Bring 1.5 liters of milk to boil; once the milk starts to boil , reduce the flame and stir continuously until it reduces to a thick semi-solid mass
  2. Add powdered cardamom powder and saffron while the milk is reducing
  3. Transfer to another bowl and bring to room temperature
  4. Refrigerate for 15-20 minutes

Bringing it together

  1. Gentle mix the khoya(already mixed with jaggery) and chena together
  2. Grease a plate or square cake pan and transfer the mixture to it
  3. Garnish with chopped almonds and pistachios
  4. Refrigerate for 30 minutes and cut out small barfis/squares and enjoy chilled or warm

Nolen Gur Kalakand | Milk Dessert with Date Palm Jaggery

Prep Time: 8 hours

Cook Time: 1 hour

Total Time: 9 hours

Yield: 100

Serving Size: 12 -16 pieces

Ingredients

  • Full fat milk- 3 litres, divided into half
  • Lime juice or vinegar - 2 tbsp
  • Nolen gur (date palm jaggery)- 3/4 cup or as per taste
  • Cardamom powder-1.5 tsp
  • Saffron- 6-8 strands
  • Chopped almonds and pistachios- 2 tbsp

Instructions

    Making Chena
  1. Bring 1.5 litres of milk to boil; once the milk is boiling turn off the heat and let it sit for 2-3 minutes
  2. Add 2 tbsp of lemon juice or vinegar and give it a stir ; milk will start to curdle
  3. Strain the whey out through a muslin placed over a strainer as shown in the picture above
  4. Give chena a nice rinse with 10 cups of water making sure there is no sour smell of lime or vinegar anymore
  5. Drain well for a couple of hours or overnight in the fridge to take away all the excess moisture
  6. Once chena has drained well, add finely chopped Nolen Gur and mix gently and refrigerate
  7. Making Khoya
  8. Bring 1.5 liters of milk to boil; once the milk starts to boil , reduce the flame and stir continuously until it reduces to a thick semi-solid mass
  9. Add powdered cardamom powder and saffron while the milk is reducing
  10. Transfer to another bowl and bring to room temperature
  11. Refrigerate for 15-20 minutes
https://onewholesomemeal.com/nolen-gur-kalakand-milk-dessert-with-date-palm-jaggery/

Categories
Afternoon Snack | 3pm Meal Breakfast | 8am Meal

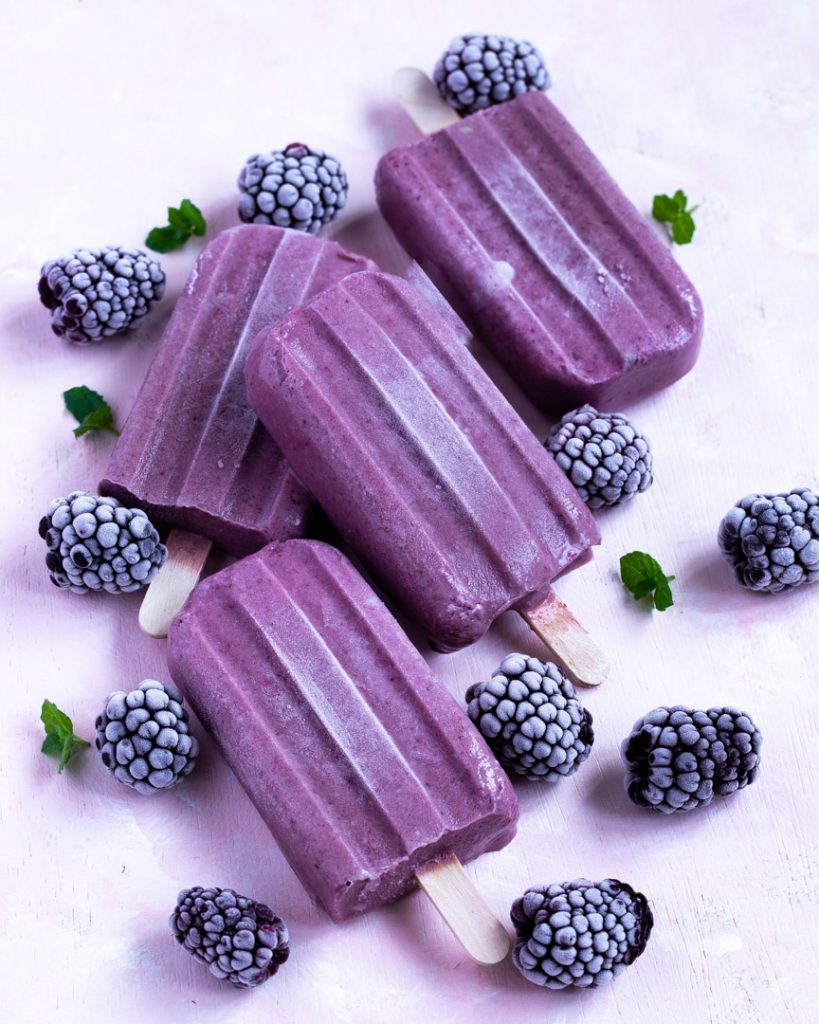
Mango Popsicles With Cream Cheese | Homemade Summer Snack

If you grew up in South Asia you would agree that leftovers are not just treated like leftovers. What it means is if you ate dal for dinner, it is quite possible the leftover dal would find its way to your breakfast or lunch plate as a paratha. Similarly, leftover steamed rice would be turned into ghee fried rice and leftover alu sabzi would become a sandwich or alu paratha. Needless to say, that particular gene has been passed onto me as well. More often than not I find myself trying to create something new and interesting with leftovers.

So, here is the story behind my Mango Popsicles With Cream Cheese.

Now, if you have seen my previous posts you know that we celebrated a birthday and there was a homemade cake with delicious cream cheese frosting. As always I went a bit overboard while making the frosting and once I was done with the cake I realised I had tons of cream cheese frosting left. Now, there was no way I was going to make one more cake to use that frosting, and just binning the remaining frosting seemed like an unbearable idea too.

Voila! I had an idea!

Around the same time, some good folks on Instagram were organising a contest inviting entries for great leftover creations. I sat deciding unsure what would my entry be when my youngest came to me. He reminded me I still had not made the mango popsicles I had been promising him for days now. And just like that, I had the idea to create these amazing mango popsicles with cream cheese. And what a dreamy creamy beautifully textured dessert it was! Now, each time that I have leftover frosting in the future, I am going to try these popsicles for sure with different kinds of flavours. The demand for the strawberry version has already been put through.

Anyhow, coming back to the popsicles, although I used the leftover cream cheese frosting, it doesn’t mean you absolutely need to use this frosting in order to make this popsicle. You can just use cream cheese, greek yogurt, and mango puree to make delicious popsicles too. I have shared the recipe for both versions. If you decide to make the cream cheese frosting, you can find the recipe in this post.

Useful tips to make a great quality popsicle

  1. Use softened cream cheese. Basically, the cream cheese should have sat outside the fridge for at least an hour. This helps to avoid any lumps in the popsicle.
  2.  Next, add a few strands of saffron to the popsicle mix as it really elevates the flavours. If you would like to skip it you can add some lemon zest.
  3. Juicy and pulpy Alphonsoes work best in this recipe. If you cannot find any, the next best option is using canned Mango Pulp.

Making Mango Popsicles with Cream Cheese

Ingredients

  1. Cream cheese softened – 1.5 cups
  2. Mango puree – 1.5 cups
  3. Roughly chopped mangoes – 3/4 cup
  4. Greek Yogurt -2 tbsp
  5. Roughly chopped pistachios and almonds – 2 tbsp
  6. Saffron, one small pinch of lemon zest – 1 tbsp
  7. 1 tbsp milk to steep the saffron in
  8. Sugar or Honey as per taste

Method

  1. In a deep bowl whisk the cream cheese and sugar/honey (if using) until smooth
  2. Then add the mango puree and greek yogurt and blend gently on medium speed
  3. Fold in the steeped saffron, chopped mangoes, and nuts
  4. Transfer to popsicle moulds, add popsicle sticks, and freeze overnight or a minimum of 5 hours
  5. Just before unmoulding tilt the moulds slightly and run under tap water or dip for 30 seconds in warm water. This helps to bring the popsicles out smoothly without breaking.

Mango Cream Cheese Popsicles

Mango Cream Cheese Popsicles

Prep Time: 15 minutes

Cook Time: 8 hours

Total Time: 8 hours, 15 minutes

Ingredients

    Making Mango Cream Cheese Popsicles with Cream Cheese
    Ingredients
  • Cream cheese, softened - 1.5 cups
  • Mango puree- 1.5 cups
  • Roughly chopped mangoes- 3/4 cup
  • Greek Yogurt-2 tbsp
  • Roughly chopped pistachios and almonds - 2 tbsp
  • Saffron, one small pinch or lemon zest- 1 tbsp
  • 1 tbsp milk to steep the saffron in
  • Sugar or Honey as per taste
  • Making Mango Cream Cheese Popsicles with leftover Cream Cheese Frosting
  • Cream cheese frosting, softened - 1.5 cups
  • Mango puree- 1.5 cups
  • Roughly chopped mangoes- 3/4 cup
  • Greek Yogurt-2 tbsp
  • Roughly chopped pistachios and almonds - 2 tbsp
  • Saffron, one small pinch
  • 1 tbsp milk to steep the saffron in

Instructions

    Making Mango Cream Cheese Popsicles with Cream Cheese
    Method
  1. In a deep bowl whisk the cream cheese and sugar/honey (if using) until smooth
  2. Then add the mango puree and greek yogurt and blend gently on medium speed
  3. Fold in the steeped saffron, chopped mangoes and nuts
  4. Transfer to popsicle moulds, add popsicle sticks and freeze overnight or a minimum of 5 hours 
  5. Just before unmoulding tilt the moulds slightly and run under tap water or dip for 30 seconds in warm water.This helps to bring the popsicles out smoothly without breaking
  6. Making Mango Cream Cheese Popsicles with leftover Cream Cheese Frosting
    Method
  7. In a deep bowl whisk the cream cheese frosting until smooth
  8. Then add the mango puree and greek yogurt and blend gently on medium speed
  9. Fold in the steeped saffron, chopped mangoes and nuts
  10. Transfer to popsicle moulds, add popsicle sticks and freeze overnight or a minimum of 5 hours  
  11. Just before unmoulding tilt the moulds slightly and run under tap water or dip for 30 seconds in warm water.This helps to bring the popsicles out smoothly without breaking
https://onewholesomemeal.com/mango-popsicles-with-cream-cheese-homemade-summer-snack/


Enjoy this fun video showing the making of these mango popsicles

Categories
Afternoon Snack | 3pm Meal

Number Birthday Cake | 4th Birthday | Vanilla Sheet Cake

Very excited to share with your how I prepared my first number birthday cake for my son’s 4th birthday!

So, in continuation of the last post, this one is going to be all about how I put my littlest’s fourth birthday cake together. His only request was a vanilla ninja cake. The vanilla cake was easy considering my favourite Joy of Baking has the easiest vanilla cake recipe with a delicious cream cheese frosting. And I am a diehard fan of that combination so choosing that flavour was a no-brainer. But making a Ninja Cake seemed to be an uphill task which involved either spending hours to create a cake which looked like an actual Ninja- there was no way I could devote that kind of time! The other option was to roll out oodles of fondant but then I am not much of a fan of when it comes to coating sugar with some more sugar, most of which eventually gets chucked away. So, there was no way I was going to do that either. Incidentally, I happened to chat with a friend and she gave me a few quick-fix ideas and hence this Number 4 Birthday Cake!

The 5 Basic Steps to Make Your Number Birthday Cake

Broadly speaking there are five steps to making this easier than it sounds Number Birthday Cake:

  1. Creating your number stencil. In my case, it was 4.
  2. Baking the vanilla sheet cake.
  3. Making the strawberry compote.
  4. Preparing the frosting.
  5. Bringing it all together and decorating.

So, without any further ado, let us begin!

1. Creating your number 4 stencil

There are a couple of ways you can do it. But the easiest way is to choose the longest side (both length and breadth would be the same size) based on the size of your cake pan and of course based on the size of the cake you eventually want. For example, I did not have a rectangular cake pan which would be ideal but an 8-inch square cake pan. This meant I needed to make two square cakes, place them together to make a rectangle with the long side measuring 16 inches. Leaving some margin, I decided to make the final cake with 12 inch long sides. With that decision out of my way, it was easy to create a stencil with the following measurements:

Number 4 Birthday Cake | Easy Number Cake | Vanilla Sheet Cake


2. Baking the vanilla sheet cake

I followed the recipe by Joy of Baking to the T except I doubled it as I wanted to make a two-layered cake. So, using my 8-inch cake pan I baked 4 cakes. Two square cakes made the base rectangle and the two others made the top layer. In between sat the delicious strawberry compote the recipe for which I shared in an earlier blog post.

Vanilla Sheet Cake Recipe:

INGREDIENTS (for four 8 inch square cakes)
  • All-Purpose Flour: 710 grams
  • Baking Powder: 22 grams
  • Salt: 4 grams
  • Butter at room temperature: 450 grams
  • Eggs: 8
  • Sugar: 600 grams
  • Pure Vanilla Extract: 20 grams
  • Full Fat Milk: 480 ml
METHOD
  • Preheat your oven to 350 degrees Fahrenheit/180 degrees centigrade
  • Butter your 8-inch square cake pan or  9 x 13 inch (23 x 33 cm) cake pan and line it with parchment paper and set aside
  • In a deep bowl using your electric mixer beat the butter until smooth
  • Add sugar and pure vanilla extract and beat until light and fluffy
  • Next, add eggs one at a time beating well after each addition and scraping sides whenever needed; beat until colour lightens
  • In alternate additions add milk and flour  and continue to whip as you do so until the mixture reaches a homogenous consistency
  • If using the 8 inch square pan, divide the batter into 4 equal parts and bake one part at a time for approximately 15 minutes or until a toothpick inserted comes out clean. If using 9 x 13 inch (23 x 33 cm) cake pan, transfer half of the total prepared mixture into it and bake for approximately 15 minutes or until a toothpick inserted comes out clean. Repeat the same for the remaining half of the batter
  • Once all the cakes have cooled down to room temperature, wrap them individually with cling wrap and refrigerate overnight. This makes the cake easier to frost and work with.

3. Making the strawberry compote

You can make the compote a day or a few hours ahead and refrigerate in an airtight container. Since it is without preservatives it stays good in the refrigerator just for a few days so try and make it just a day prior. You can find a detailed recipe here.

4. Making the frosting

I decided to make the cream cheese frosting as it tastes great even with little sugar and with the lime added to it, brings in tons of fresh flavours to the cake. It is also not as heavy as the buttercream frosting. And because I was going to be using minimal frosting just for flavour and not for decoration it was a better option. Use only full fat cream cheese at room temperature for best results

Cream Cheese Frosting Recipe:

INGREDIENTS
  • Butter at room temperature: 100 grams
  • Castor Sugar: The original recipe calls for 180 grams but I used 150 grams
  • Pure Vanilla Extract: 4 grams
  • Lemon Juice: 4 grams
  • Lemon Rind: 1 tbsp
  • Cream Cheese, really soft and at room temperature: 340 grams
METHOD
  • In a deep bowl using your electric mixer beat the butter until smooth
  • To softened butter add powdered sugar and beat until light and fluffy
  • Then add softened cream cheese in gradual additions, scraping sides as needed
  • Add vanilla, lime juice, and lemon rind and mix well
  • Refrigerate for half an hour before frosting

5. Bringing it all together and decorating

I made a quick video to share how I brought it all together which is attached below. I followed the steps in the following order :

  1. The four refrigerated cakes were brought out. Two 8 inch cakes were put next to each other and then the other two stacked on top
  2. The number 4 stencil was placed on top and the cakes were shaped accordingly (please refer to the video to see how I did it)
  3. Then the layers were separated and strawberry compote filled in; holes poked for the compote to seep through and absorb well through the cake
  4. The top layer was placed back and the cake was frosted
  5. Kit Kats were used to make the fence
  6. Because the Kit Kats were taller than the actual cake, so Maltesers were added to adjust the height
  7. Finally, the smarties were added on top

Now, at this stage, you can refrigerate the cake (or not) depending on when you are going to be cutting it. I finished making the cake late at night. To s and we were going to be cutting it early the next morning I decided to just let it chill in a really cold room with an air conditioner on at 18 degrees. Before cutting the cake I added some Ninja figures. So, this way I exceeded expectations- the birthday boy got a Ninja cake topped with his favourite candies and shaped like number 4 !!

Here is the video which will give you a better idea as to how this Number Birthday Cake was put together :


Number 4 Birthday Cake | Easy Number Cake | Vanilla Sheet Cake

Prep Time: 8 hours

Cook Time: 2 hours

Total Time: 10 hours

Yield: 100

Serving Size: 12-14

Ingredients

    For four 8 inch square cakes
  • All Purpose Flour: 710 grams
  • Baking Powder: 22 grams
  • Salt: 4 grams
  • Butter at room temperature: 450 grams
  • Eggs : 8
  • Sugar : 600 grams
  • Pure Vanilla Extract: 20 grams
  • Full Fat Milk: 480 ml
  • For Cream Cheese Frosting
  • Butter at room temperature: 100 grams
  • Castor Sugar: The original recipe calls for 180 grams but I used 150 grams
  • Pure Vanilla Extract: 4 grams
  • Lemon Juice: 4 grams
  • Lemon Rind: 1 tbsp
  • Cream Cheese , really soft and at room temperature : 340 grams

Instructions

    For Vanilla Sheet Cake
  1. Preheat your oven to 350 degrees Fahrenheit/180 degrees centigrade
  2. Butter your 8 inch square cake pan or 9 x 13 inch (23 x 33 cm) cake pan and line it with parchment paper and set aside
  3. In a deep bowl using your electric mixer beat the butter until smooth
  4. Add sugar and pure vanilla extract and beat until light and fluffy
  5. Next add eggs one at time beating well after each addition and scraping sides whenever needed; beat until colour lightens
  6. In alternate additions add milk and flour and continue to whip as you do so until the mixture reaches a homogenous consistency
  7. If using the 8 inch square pan, divide the batter into 4 equal parts and bake one part at a time for approximately 15 minutes or until a toothpick inserted comes out clean. If using 9 x 13 inch (23 x 33 cm) cake pan, transfer half of the total prepared mixture into it and bake for approximately 15 minutes or until a toothpick inserted comes out clean. Repeat the same for the remaining half of the batter
  8. Once all the cakes have cooled down to room temperature, wrap them individually with cling wrap and refrigerate overnight. This makes the cake easier to frost and work with.
  9. For Cream Cheese Frosting
  10. In a deep bowl using your electric mixer beat the butter until smooth
  11. To softened butter add powdered sugar and beat until light and fluffy
  12. Then add softened cream cheese in gradual additions, scraping sides as needed
  13. Add vanilla, lime juice and lemon rind and mix well
  14. Refrigerate for half an hour before frosting
  15. Bringing it all together and decorating
  16. Bring out the four refrigerated cakes. Place two 8 inch cakes next to each other and then stack the other two on top placing them in the same manner as the base
  17. Place the number 4 stencil on top of the stacked cakes and cut out the shape accordingly (please refer to the video to see how I did it)
  18. Then separate the layers and fill in the strawberry compote in the centre; poke holes for the compote to seep through and absorb well into the cake
  19. Place the top layer back and frost the cake
  20. Add Kit-Kats to make the fence
  21. Then place the Malteasers on top to adjust height 
  22. Finally place Smarties on top
  23. Refrigerate and bring out two hours before cutting the cake
https://onewholesomemeal.com/number-birthday-cake-4th-birthday-vanilla-sheet-cake/